10 Things I learned about you, Low-Carb cooking

When I tell most people we are on a low carb diet- i.e. less than 50g per DAY, they first ask me if I’m crazy. Yes. Yes I am. Second, they say that they could never do it, they love bread, fruit, -insert carby thing here- too much. I also love bread (see Oh Hello Sour Dough, parts one and deux) and carby things (see all of the other recipes on here). With our recent experiments in low carb cooking, I’ve learned some very valuable cooking lessons.

Low carb cooking is not for the faint of heart. It requires integrating new techniques and ingredients into your repertoire that you may not have expected.

1. The more spices or seasonings you add, the better
In regular cooking, you can rely on the regular ingredients to contribute to the dish. Pasta, rice, bread, etc all add a certain subtle flavor that you’ll miss if you don’t crank up the flavor dial. For instance, if you are making a lasagna: use vertically sliced zucchini layered with grated smoked mozzarella and pungent pecorinos and some asiago, home-made tomato sauce with lots of basil and balsamic. Using the best dried spices you can find also helps, use your schnoz. If you can barely smell it, the flavor won’t be so bright either. Visit a Penzy’s, ethnic market, or bulk foods store so you can pick them out. Think about the ingredients you use before you use them and what they could add to the dish if they were slightly different.

2. If you are adapting recipes, lower your expectations
Don’t expect artificial sweeteners to act like sugar, nothing else acts exactly like potatoes do, don’t expect Shiraki noodles to have the same consistency as pasta. You’re just setting yourself up for failure. Aim low. They’ll be close, and will probably satisfy your craving, but as Marvin and Tammi say “Ain’t nothing like the real thing baby”. If you’re really jonesin’, indulge, don’t beat yourself up about it, and get back on track asap.

Oh and if you are using Shiraki noodles, rinse the crap out of them, microwave them, then rinse them again i.e. follow the directions on the pack. It’ll get rid of the feet smell the noodles normally have.

3. Bob and his Red Mill are your new best friends
Bob’s Red Mill will make just about everything you need for baking. Here’s what I like to keep around: Almond meal, Coconut flour, Flax meal, Vital wheat gluten- unless you are gluten free, xanthan gum or powdered arrowroot, and soy flour. Maybe throw in a chia seed if you’re feeling adventurous, I sure am. The wheat gluten helps make things chewy rather than sandy, if you’re going for sandy cookies or crumbly muffins, great. Have a blast. If not, add the wheat gluten, xanthan gum, or arrowroot. Oh, and Xanthan gum is something that comes from evil corn, not something Martian children chew. Just thought I’d clear that up.

4. Think about textures
Using breadcrumbs is required for many recipes from coating fish to pan-fry to mixing into a casserole to add bulk and texture. Last time I checked, bread crumbs are made from bread, so they are off limits. Almond meal and flax seed meal crisp up almost as well, plus they add fiber and nutrients to an otherwise unhealthy coating. Flax meal will thicken up just as well as any breadcrumb within the casserole, and a mix of almond meal and finely grated Parmesan, toast up for a crunchy topping. Almost anything you can think of will have a low-carb equivalent or close match. I make a creamed spinach/kale/chard casserole and you could probably never tell the difference in mine and my mom’s. Except mine is better..tasting and nutritionally. If you are going for a custard-type feel, get to know unflavored gelatin.

5. Extracts give the best-acts– boooo.
In the place of fruits, their extracts will give you the closest thing to their flavor that you’ll get. If you plan on keeping some kind of sweet things in your diet, keep the flavor but nix the carbs by using extracts or edible essential oils in their place. When making low carb pancakes for instance, melt together a half tbsp of butter, 3 tbsp granulated splenda or artificial sweetener of your choice, a splash or two of almond milk, and 1/4 tsp maple extract as your syrup. If you like a stronger maple flavor, add more extract.

6. Use Soy flour SPARINGLY
Pretty straightforward. If you get a little overzealous the whole thing will taste like a wet cardboard box. Always cut soy flour with something else. Or better yet, don’t use it at all, go for a flavorless protein powder.

7. Manipulate vegetables to use as substitutes
Turnips or rutabaga make a pretty close substitute for mashed potatoes, chayote squash makes a pretty decent apple sub- with added spices, summer squashes make decent pasta subs- grated into noodles or sliced thin, cauliflower can be grated into rice, Spaghetti squash- pretty obvious,use seedless cuke slices or celery sticks with your dips

8. Cheeses and Dairy are your friends– sorry vegans.
You should keep with you some Ricotta, ground parm, mascarpone, cream cheese, and other shredded cheeses that are aged- your faves. Ricotta, mascarpone, and cream cheese can go savory or sweet. Keep these to a minimum, though, there are hidden carbs in cow’s milk, and less fermented or aged cheeses. Try alternative milks like goat or sheep products. Just about all of the barnyard animals make things that you can and should use.

9. Don’t be afraid to experiment and/or fail.
How will you know how the flavors will interact or the textures will act in different situations if you don’t give it a go? Give peas a chance. Try different produce to get the same effect. If it doesn’t work out? Take mental or real notes, analyze what you could do different, adjust for next time. If it does? Yep, you totally meant that to happen the whole time. You’re a genius.

10. Have the right tools to make it happen
This is a basic idea that can apply to all cooking, but having a few items help make this diet easier. A mandoline, a grater that can do strips or strings, a hand masher, an immersion blender, and a food processor can make your life alot easier.

Since Mardi Gras and Valentines Day are both coming close, and sweets are encouraged- I leave you with a low carb truffle recipe so you can have your valentine’s and eat it too.

Flavored truffles
4 oz unsweetened chocolate- Dagoba
3 tbsp cocoa powder
1/4 c coconut milk- unsweetened
1 tbsp coconut oil or butter
1/2 tsp instant coffee granules
3-4 tbsp splenda or other granulated sweetener
1 tsp vanilla extract

for decoration and flavor: Chopped nuts or unsweetened, toasted coconut flakes, unsweetened cocoa powder and a pinch or cinnamon- mixed

Add the unsweetened chocolate, cocoa powder, coconut milk, coconut oil, and coffee granules in a small saucepan. Heat over low fire, and stir until it becomes a smooth. Remove from heat and add the spenda and vanilla. Transfer to a deep plate or a shallow bowl. Refridgerate until slightly firm. Scoop by the teaspoon and roll between palms to form a ball. Roll in desired decoration like nuts, coconut, or cocoa mixture. Place in individual cups in a pretty container and give it to someone special.

Alternate flavor options:
Berry truffle- Raspberry or Strawberry extract, add after mixture is removed from the heat- 3/4 tsp, roll in crushed freeze dried strawberries or chopped almonds
Tropical orange- Orange extract- add with vanilla-1/2 tsp- roll in coconut
Pecan pie- Rum extract- 1/2 tsp add with vanilla in recipe, roll in chopped pecans
Peanut butter banana- banana extract, 1/2 tsp added with vanilla- roll in chopped peanuts
Maple bacon truffle- add 1/2 tsp maple extract and roll in salted bacon bits

Enjoy!
-Stine

Tagged , , ,

Galumpkis, Low Carb – High flavor

Tomorrow starts round two of my hubz and my diet which means no carbs. i.e. no sugar, no fruit, no pasta, no potatoes, no rice, breads, doughnuts, etc. So while today I eat all of the carbs as a sort of last hurrah (seriously, I made yeast doughnuts-glazed-and chocolate), I remembered this recipe I made a while back.

the mixin’s for galumpkis–not the cheese or wine, that was another thing.

Sometimes I get these urges to eat comfort food from other cultures. I love Korean or Vietnamese noodle dishes, Chinese hot pot, Samosas, just about anything caribbean or wrapped in a tortilla,  poatoe-y british and irish food, italian pasta-heavy dishes. Who doesn’t love anything warm and soothing? Its like not thinking puppies or kittens are cute.  Anyway, I have this plan to spend a day each weekend (when we have children and they are old enough to remember) to learn about and prepare a meal from a different culture. Just about every culture  has a comfort food, and I want to try each one. The challenge arises when you try to make those comforting foods healthy.

There happens to be a very amazing eastern european restaurant a block from my house and I have to keep myself from going once a week to get pierogis and german potato salad. A few months ago, I went for dinner and strayed from my normal choice to get cabbage rolls- or galumpkis (spelling changes depending on who you talk to). They blew my mind. I almost could not keep the conversation going they were so warm and delicious-  and even in the middle of August, they were a welcome warm treat. A few weeks ago I was salivating over the memory of them and decided I can make my own, but healthier and without all of the carbs, so the hubz can eat it. This switches out the heavier ground pork or beef for ground turkey, white rice switches out for riced cauliflower, and breadcrumbs are switched for a mix of soy flour and almond meal. They were almost as good and definitely as satisfying. You can only eat about 2 of these for a meal. 3 if you are starving. 4 and I think your belly explodes- Monty Python style.

The making of these is a little time consuming, so make sure sure you have a few hours to devote to this. However, you will have lunch/ dinner for the week or its good for a dinner party/pot luck. You will need: head of cauliflower, a head of cabbage (mine was the size of a baby), ground turkey, unsweetened evaporated milk-low fat or light if possible or you can sub milk I guess, a 32 oz can of tomato sauce, and the rest you should probably have in your pantry or fridge.

Lets get to it!

First, put on a large stock pot filled about 2/3 the way with water to boil. Core your cabbage, remove the outer leaves if they are damaged or icky. While you are waiting for the water to boil, rice the cauliflower by chopping it fine or grating it in your food processor. Pour half of the can of evaporated milk along with salt and pepper to taste over about 2 cups of the riced cauliflower, then chicken stock to just cover the cauliflower. Microwave on high for 7-10 minutes, until the cauliflower is just cooked.

By now the water in your stock pot should be boiling or just about as hot as you need to work on some cabbage leaves. Carefully, dunk the cabbage into the water and after about a minute, the outer two leaves can be carefully peeled off and soft enough to fold without cracking. The leaves should become slightly translucent when they are done. Once you have about 15-18 leaves, you can save the rest of the cabbage for another project, and then begin to mix the filling.

Saute about half an onion chopped with 2-3 minced cloves of garlic. Set aside to cool. In a large bowl, mix one pound of lean ground turkey with the sauteed onion and garlic, one egg, a tablespoon of parsley. Drain the liquid from the cauliflower and add it to the mix with about a tsp of salt and pepper to taste. Then add 1/2 c of soy flour or almond meal (or a mix of both), until it forms a tacky mixture.

Lay out one cabbage leaf, put in about 1/2 cup of the mixture in the center and roll up like a burrito. Repeat until all of the mixture is used.

1. Put filling on the cabbage leaf

2. Fold over the top

3. fold in sides and begin to roll

4. Roll tightly to meet the edge of the leaf. Trim excess as needed

Line a roasting pan with cabbage leaves and spread about 1/2 c of tomato sauce in the bottom.

Nestle rolls in cabbage lined pan

Lay the cabbage rolls in the pan until they are snug as a bug in a rug. Cover with the remaining tomato sauce and bake for 45 min to an hour at 350 degrees or until the filling has firmed and the outer cabbage is tender. Serve warm while you are wrapped in a blanket.

Presentation was not everything, sorry, I actually added the left over stock and evaporated milk mixture used to steam the cauliflower into the tomato sauce in an attempt to make something creamy and tomato-ey but obviously, that didn’t work out. so don’t do that. let the tomatoes do the saucing. I learned that the hard way. It still tasted awesome!

These rolls are so filling and delicious the carbs are not even necessary here. Try it. love it. I bet you will.
I’ll be posting more low-carb recipes as the diet progresses, but I promise that I wont post anything that the average carb-eater wouldn’t like. Pinkie swear.

-Stine

Tagged , , , ,

A bad mother…shut your ‘booch!

Batch 2

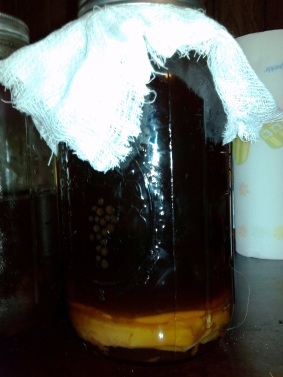
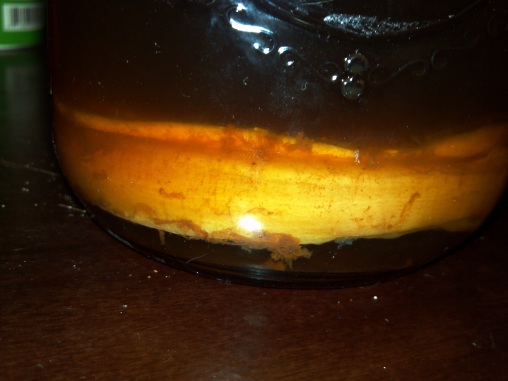
My second batch of Kombucha- mid first fermentation

Kombucha. A mysterious, tangy, bubbly beverage that seems like a secret world of experimental curative beverage culture (get it? cuz kombucha is a culture? lulz). Actually, its totally not that big of a deal until you get to the fizzy parts and the whole obtaining a “mother”. Yeesh. I’m going to go ahead and pre-apologize to the squeamish or icky-averse. You should probably skip this post. Read on at your own risk.

It seems like there has been somewhat of a kombucha craze in the past few years, reaching all corners of the US and their grocery stores. Honestly the whole thing kind of gave me the heebie-jeebs until I gathered myself and finally tried it. Before that it seemed to be secluded to fancy schmancy food co-ops only in Brooklyn or San Francisco where there is a special room, a certain knock, and an equally obscure password to even access it…”artisan”. Now its on the shelves of grocery stores next to the smoothies and pomegranate juice. Buying a bottle, at roughly $3.50 each, becomes an expensive habit. From what

I can tell the draw mainly seems to come from the flavor (like a mix of apple cider vinegar, black tea and carbonation- plus whatever else they add to the batch)  it is refreshing, acidic, and slightly sweet. But many also seek it out for its list of “curative” powers which include, but are not limited to:
– Getting rid of gray hair
– Growing in dark hair
– Cures cancer
– Reverses the symptoms of AIDS
– Cures Dia-beet-us
– Filling one with bologna

So I may have added one of those. I like it for its flavor, and its something I find rewarding, especially when babies are made. You heard me. Babies. It multiplies.
The whole idea is pretty age-old, fermenting a sweet beverage until it becomes bubbly and not as sweet anymore and maybe a little alcoholic (only 0.5%). What’s different is the mother.

MAMA!!!

My Kombucha mother with baby attached

The Mother. The Manchurian Mushroom. The Blob. The Kvas. The Tea Sponge. The ‘Boocha Baby-Maker. Boochie-Mama.
Whatever you call it, its the disc-shaped blob that turns your regular ol’ sweet tea into a batch of ‘booch. You can get it in co-ops, online, or from a marvelous friend who happens to have what would equal a fungus version of “Sister Wives”. Let’s just say it’s all in the family and they produce like rabbits. A large mother looks like one of those Pillsbury Grands buscuits, only larger and wet.

I’m really sorry I just ruined these for you

When you touch it, which you will probably have to,  it feels like like a jello “jiggler” that was left in the fridge too long. Springy, firm but slippery- not slimy. What is it made of you ask? it is a “community of bacteria and yeasts that have a symbiotic relationship”- a community? does that mean microscopic block parties?

Basic Kombucha

Before you begin your batch, I recommend reading this article to be aware of all of the risks associated with fermentation. Its similar to the risk of canning, but as long as you stay sanitary and sterilize with vinegar, you should be fine. If it looks of smells odd- don’t drink it. DUH. OK post warnings- To make a batch of the booch, you’ll need:

A mother culture in starter tea
A large jar, or a few for multiple batches
Cheesecloth, a papertowel, or thin fabric
A rubber band or canning ring
Sweet Tea , Strong black tea ans sugar mixture, cooled to room temp sweetened with at least 10% sugar content (for a half gallon, I used about 1 cup of sugar to 2 quarts water)
White vinegar

So here’s what you do:
1. Get a mother, it should come in some starter liquid called starter tea that will help it acclimate to the new tea surroundings.
2. Prepare a jar, at least a half-gallon if not larger, and preferably wider than it is tall. (I have no idea where to find such a jar so I just used a half-gallon Ball canning jar) Wash the jar with soap and water, and rinse thoroughly. Once it doesn’t smell like soap anymore, add 1/2 cup of white vinegar to the jar and swish around to coat.
3. Coat your hands with vinegar, or just the one that will be handling the mother, and pick up the mother (try not to heave)
4. Place the mother in the prepared jar, and pour the liquid it came in over it.
5. Pour in the sweetened tea mixure
6. Cover the top with a paper towel, layers of cheesecloth, thin fabric, etc and secure with a rubber band or screw the lid on. *Be careful not to let the booch or mother touch the metal.
7. Let sit in a warm slightly dark place for 7-10 days. After this time, look at it, smell it, taste it. Once it becomes slightly vinegary smelling and tastes slightly tart but not like drinking vinegar, your first batch is done.
– Remove the mother and repeat the process for the next batch, saving some of the liquid to go with it. (Oh it probably had a baby, once it is 1/4″ thick, it can begin to make its own batch of booch and have its own babies)]

Batch 1

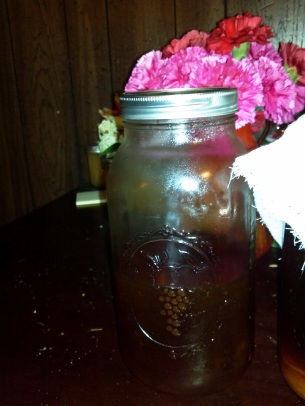
First Batch without Second Ferment

Thus far, I have stopped here. I enjoy the slightly tart sweet tea that comes from the process but I will soon go for a second fermentation to make it bubbly. To do that, you add more sugar like a 1/4 c sugar or a handful of sugary raisins. Cap the tea tightly so that it is air-tight (transfer into a plastic bottle as glass might shatter if too much pressure builds up), maybe using an airlock if you can find it in a homebrew store. Set in a warm spot or place the bottles in a cardboard box or cooler equipped with an electric blanket to keep it warm and start the second fermentation. After 2 days, check to see if it is bubbly, if all goes well it should be.

I’ll try this with my next batch and post how it goes!
Boochin it up.
– Stine

Tagged , , ,

Cannin’ Carrots

Big ol’ bowl of carrots.

So say Crafstine sees you coming home from work and says, “Uh. Hey. I have a lot of carrots? Do you want some to pickle? I ran out of quart jars….” you say HELL YES. Have you ever had spicy pickled carrots? NOW YOU WILL.

This recipe made 6 quarts of carrots and we used Sherri’s recipe from Put ‘Em Up! Another blogger used Sherri’s recipe with a larger volume since she was also doing quarts, which helped us out a lot. Here’s the blog post!  Let’s Go!!!!


10 cups Distilled white vinegar
3 cups Sugar
7 Tablespoons Salt
4 Jalapenos, sliced (or cherry peppers…or both? or any other spicy delicious pepper)
8 – 10 Garlic cloves, peeled and sliced
1 Tablespoon Red Pepper Flakes


We didn’t end up using red pepper flakes because we had some seriously spicy peppers. To start out, prepare your jars. My stove is ANCIENT and takes A LONG TIME so this is all about time management for me. I start the jars before I do anything with the produce that I’m processing. Once you get your jars going in the hot water bath to sterilize them, prepare your jar fixin’s.


Peppers and garlic. WASH YOUR HANDS IMMEDIATELY/DO NOT TOUCH YOUR EYES.


Start your brine! Put the water, vinegar, and salt into a pot and bring up to a boil. Once it’s boiling, you can either simmer it until the jars are done, or if you timed it juuuusttt riiiight you can just pour it right into the jars!

Once your jars are good to go, about ten minutes in the bath, take them out and start packin’. I’m not sure how many pounds of carrots we used, since Crafstine had THE BIGGEST BOWL EVER, but we didn’t even use the entire bowl that was shown -we probably used 3/4 of the bowl. Put the peppers and garlic in, the carrots can be packed in as much as you can fit, and then pour the brine over the carrots. Headspace should probably be around 1/2 an inch, because as the carrots move around and release their own fluids, the liquid covers enough. Heat up some lids in some hot water to activate the seal and sterilize the rings, and process in a hot water bath for 10 minutes.


Enjoy these with sandwiches! Burgers! On hot dogs! Straight out of the jar! I hope you enjoy these, as these are probably my favorite pickle.


Stay cool while canning! With the stove on for hours it gets brutal in the kitchen.

Until next time!

-megz

Tagged , , , , ,

Nectarine Gingery Jam. Small Batch.


My editor….so.bossy.

Small batch canning has intrigued me for a while. A jam is a jam no matter how small, right? Then there’s that plus of not having hours of work, what seems like endless piles of fruit to prep, sweat rolling down your back, random sticky spots on your arms …and sometimes cursing (I’m lookin’ at you cherry vanilla jam). So when I saw a triple ginger nectarine jam in this month’s Food and Wine magazine, I was all about it, but I didn’t have the 2.5 pounds they asked for. I had a trio of nectarines that surely wouldn’t last through the week. This should taste good right? After all nectarines are like peaches, who have gone bald…AND you don’t need to spend hours peeling them like their peachy relatives. Bonus! I have a family reunion coming up and I volunteered to bring jams for my cousin’s bridal brunch and anything goes well with buttermilk biscuits.

Since I had three large-ish nectarines left, I decided to go for it. I want to taste summer in a jar. and cobbler. yom.
Gather the ingredients.

Ingredients. (Sugar not pictured)

I also wanted to add a flavor that would may you say, “mmm, what else is in this” thus the Chinese 5 Spice. I figured that spice went really well with plums, why not other stone fruit?

Ch-ch-ch-choppin’ nectariiine

Before you prep the ingredients make sure you put a larger pot of water on to boil the jars that you will be filling. Here are mine..tap dancing in the water

tap tap taptap tap tap

Combine the nectarines, water, lemon juice (I added extra just to be safe), ground and grated ginger, 5 spice- or cardamom if you so choose (lemon zest would be great in the place of these), and pectin in a saucepan. As seen below:

First couple ingredients in the saucepan..that white powder is the pectin, I swear.

Bring this to a boil and mash as the fruit begins to soften. Once boiling, add the sugar and stir/mash until combined.

Cook until it looks like this

Once your jars and rings are sterilized, remove from the water, and set on a tea towel. Fill with jam.

As always, prepare more jars. Just in case.

While you are filling, drop your lids into the boiling water that the jars were in to both sterilize and activate the seal. wipe the rims of the jars with a damp paper towel, then lid up.

Put on the rings and twist until just finger-tip tight. Put these into the boiling water bath. Process 10 minutes. Wait for the oh-so-satisfying ‘ping’ of the jar lids sealing. If you dont hear it and any do not seal within 5 minutes, take the lid off, wipe down the rim, reapply the lid and ring, process for another 10 min.
RECIPE:
Ginger-Spiced Nectarine Jam

Ingredients:
3 large Nectarines- skins washed and fruit chopped
1.5 tbsp of Lemon Juice- bottled to assure reliable acidity
1 tbsp low or no sugar pectin
1/3 c water
1 tbsp fresh grated ginger
1/2 tsp ground ginger
pinch of Chinese 5 Spice (I wasn’t really satisfied with this flavor, I think cardamom would have had a better impact)
1/2 c Sugar

Combine everything except the sugar in a saucepan. Bring to a boil. Add sugar and stir until combined. Bring to a boil and mash fruit as you go. Follow the boiling water method of canning. Process for 10 min. Store in a cool, dark place for up to a year.

There you have it. Tangy, juicy, delectable. Hopefully it makes your day better when you open a jar. It sure can’t hurt!
Slather on biscuits, crackers, toast, maybe spoon into small, pre-baked pie crusts and top with whipped cream.

Just put it in your mouth.

Enjoy!
-Stine

Tagged , , , ,

This is BERRY delicious!

This post was brought to you by:

Curiosity with St. Germain! Gin and Tonics! 

Disclaimer: Maybe you want to limit yourself to one of those. We’re dealing with potential botulism here. PS: These were delicious.

Crafstine and I, in a fit of frustration the other day, made Strawberry Jam! It’s BERRY DELICIOUS. Now is prime time to get your strawberries. I read online that because of the freaky weather, strawberries may have a short season. Don’t delay! These guys are amazing!

This recipe is from the book Well-Preserved, and it is dynamite! I’m looking forward to canning other recipes from this book. I took it out of my library and you should too!

8 cups of sliced strawberries

6 cups of sugar

1/3 cup of lemon juice.

5-6 8 ounce preserving jars (with lids and rings! and if you are not good with measurements/eye-balling amounts, ALWAYS prepare more jars.)

First off, place your empty  jars into a big pot filled with water- submerge those jars and put them on the stove to boil. That sanitizes the jars and enables us to fill them with molten hot lava-like jams and they won’t crack. Your lids and rings should also be sanitized, but I like to do that right before we fill the jars because of the questionable amount of jam you may have. If you have less than you sanitize, it’s not really good for the lids to be subjected to hot temperatures (in the sterilization process) because it activates the seal and may create a faulty seal the next time you use that lid.

In a heavy pot, put the sliced strawberries in and heat on medium heat. Crush the strawberries with a potato masher, to the consistency that you prefer.

Add the sugar and lemon juice and bring to a boil. Now, you may be thinking, HOLY SUGAR. THAT AMOUNT OF SUGAR WILL CREATE DIABETES. I agree, it’s a lot of sugar, however, sugar helps it set and increases volume. It also is a PH issue where you want to create an acidic environment, but not too acidic because that’s yucky, and the higher the acidity the less likely you will have bad bacteria in your jams growing and creating botulism. Usually I follow this to a T in recipes because I don’t want to get botulism. Crafstine is planning on experimenting this summer using low-sugar/no sugar needed pectin, but that kind of scares me. She’s bold.

We also added vanilla extract because vanilla and strawberry is AMAZING. It was nice little glug, probably three teaspoons?

Bring that to a boil. Once it’s boiling, reduce heat and let it simmer for 15-20 minutes. It should thicken and be delicious looking.

Once it has thickened, you turn off the heat, stir for two-three minutes, remove the creepy foam and then you’re ready to can!

Remove your hot jars from the pot (keep the pot boiling) and place on a towel. It’s important for these jars not to hit anything or be subjected to varying temperatures because they’ll crack. You should have specific tools for this job too; jar lifter, magnetic stick to get lids and rings out, and a funnel. I’ve canned without these items, using tongs and ladles, but it’s a real pain in the neck.

This recipe calls for leaving 1/4 inch headspace. Fill your jars and leave 1/4 inch headspace. Remove air bubbles using a wooden spoon handle or chopstick.

Once you have all your jars filled, then you can sanitize your lids and rings. I typically take a small saucepan and just take water out of the boiling pot of water and throw the amount of lids in. That way, the water is already boiling! Once they’ve been sanitized (10 minutes), you can remove them with your magnetic stick and then put that water back in the pot.

You put the lids on and then put the rings on just until they are fingertip tight. Do not TIGHTEN them, just turn them until they stop turning. Then, using your jar lifter, place the jars back into the pot of boiling water and boil them for 10 minutes. Remove from the pot and put back on the towel. Soon, you’ll hear the PING of the jars, letting you know that they’ve set!

Once they’ve been sealed, it’s advised that you leave them in the same spot to cool for 24 hours. They’ve been through a lot, and you don’t want to shake ’em up too much. After that, it is suggested that you keep them on the shelf without the bands on. Label them with what it is, and when it was made. As a rule of thumb, you should eat these preserves within a year. I know I go through a lot of homemade fruity jam in the wintertime on sandwiches, crépes, pancakes, toast, in breads, in frostings, in…..well, you get the idea. These last a long time, you know what’s inside of them, and you can adjust to your own taste!

Good luck! If you’re seriously interested in canning, it’s important to know all of the proper sanitation and PH rules because you seriously do not want botulism. Seriously.  There are many different resources out there in book or internet form for you to find and learn more!

-megz

Tagged , ,

The Curd is the word

Once upon a time, I thought that citrus curd was this mysterious, highly unstable substance that could only be made in professional kitchens by highly skilled people only wearing white- Like the food equivalent of plutonium. Then, a few weeks ago, my dear friend Megzy had a birthday coming up. No ordinary cake would do, this is the gal who helped me painstakingly can 60 4oz cans of peach lavender butter as wedding favors last fall. I contacted her “boyf”- boyfriend to begin scheming a cake. I found out that this little lady likes key lime pie..OH REALLY?! So I dreamed up a vanilla coconut cake, frosted with a toasted meringue-esque frosting, with graham cracker sprinkles on lime curd as the filling.

This was my chance, to show myself (and the world) that curd was nothing to be afraid of. Egg yolks, citrus juice, sugar, butter maybe some zest. That’s really all that goes into a citrus curd. There are fancy recipes that call for double boilers and furious whisking.. but those are for chumps. The only criteria I see is that you have arms with working hands and that you can stand near your stove for about 15 min to stir frequently. Wait, what’s that you say? You really prefer sitting?Well pull up a stool. You’re doing this. I promise, you’ll be glad you did.

Not sure if yolks are beautiful or I’m freaked out by them.

I had a game plan: Zest and juice about 5 limes (you wont use all of the zest, but its good to have on hand in the fridge), get my butter cubed and ready, ready my whisk and wooden spoon, stretch necessary hand/arm muscles (not actually necessary),  and then begin separating eggs to get the show on the road.

Lime Massacre

Recipe time..GO!

_______________________________________________________________
Lime
(or just about any citrus) Curd– aka Awesome Sauce
makes between 1-3/4 cups, or a little less than 1 pint
(adapted from Food in Jars’ Meyer Lemon Curd)

6 egg yolks
1 cup sugar
1/2 cup citrus juice- lime, or key lime (if you have a thousand key limes and a few hours to burn)
1 stick of butter (let it come to room temp at the beginning of the recipe)
1 tbsp zest- optional if you want a smooth curd

In a relatively small saucepan- 1+ qt, Over low heat whisk together egg yolks and sugar, once combined add lime juice and stir together. Reduce the heat if necessary, you want to avoid boiling this. Stir frequently, almost constantly, but in no way furiously. After about 9-10 min it should have thickened a bit, and it is done when you can take the spoon out of the mixture, the back is coated, and you can draw a line down the back of the spoon with a clean finger, and it doesn’t run back together.  When in doubt, give it another minute but keep stirring frequently. If you want to be sure, the mixture should read between 165 and 170 on a candy thermometer.

Once you have reached the temp/consistency needed, remove it from the heat, and start stirring in your cubes of butter, 2-3 at a time (if you cut the butter stick in half long way and then into table spoons). Once those have melted almost completely, add another round and keep going until the butter is completely incorporated. Work the mixture through a fine mesh sieve, to get out any cooked eggy bits. Now you can stir in the zest if you so choose. Store in tupperware with a layer of plastic wrap directly on the surface of the curd, so an icky skin doesn’t form. Refrigerate overnight aaand Boom. Sauce complete.
___________________________________________

Zest goes in

Put on anything that needs a little zing. Biscuits, a cake, a panna cotta, berries, filling a tart, as the sauce on a dessert pizza, on top of a rice pudding, on your finger, or a spoon if you must.

Because I wasn’t sure how much I would need to fill the 4 layers of the cake, I increased the recipe by half (i.e. add- 3 yolks, add 1/2c sugar, add 1/2 stick butter, add 1/4c juice- to the recipe as is). Worst case scenario you have some left over…and if that’s your worst case scenario, you are doing pretty well my friend.

ERH MEH GERD! CURD!
-Stine

Tagged , , , , ,

Date Bars.

Lara makes bars that are sticky and chewy and delightful.  Now, so do I and so can you!
Instead of spending $2.50 on a bar, I thought, hey, I can do that. I thought that at 11pm last night. Sorry upstairs neighbor, hope you can’t hear my food processor.

Step 1: Choose a flavor
This is often contingent on the ingredients in your pantry/ fridge, but you can plan ahead, I guess. If you want to be all organized and stuff.
I decided to make some kind of chocolatey spiced cranberry coconut pie bars. If necessary, consult the flavor bible a la Meg’s house.

Step 2: Ingredients..ASSEMBLEEE!
I didn’t exactly measure, but here are round-a-bout measurements.
1 package of dates, pitted and ready. I think usually its about 20-25 dates in a package
2/3 cup cranberries
1/2 cup coconut
3/4 cup slivered almonds
a small sliver or two of crystallized ginger
2 tbsp honey
1/4 c mini chocolate chips
1/3 c cocoa powder
1 tsp cinnamon
1 tsp lemon juice
1/3 cup protein powder or you could use almond meal or coconut flour
Water or applesauce…until desired consistency

This shows the final mixture in the pan and all of my spills

Step 3: Blend it!!
Put everything in the processor bowl except the water or applesauce. Blend until you get a doughy consistency similar to chunky play-dough. If it is too dry add a tablespoon of water or applesauce, if its too wet, add more almond meal, coconut flour, or protein powder, again a tablespoon at a time. The mixture should just begin to ball up but not be too sticky. If its still too sticky take it out and knead in a little more of your dry ingredient.

Step 4: Smush it.
Prep a square baking dish by tearing sheets of wax paper to fit crosswise on the bottom and sides. Wax paper is best for this because it wont stick to your bars and you wont mess with the consistency by having to spray parchment, not to mention end up with greasy fingers. Foil would be a nightmare. drop the date mixture into the baking dish and use your very lightly oiled hands or the bottom of a very lightly oiled measuring cup to flatten into the pan. Once you get it relatively flat, put another piece of wax paper on top and smooth it out.

thoroughly smushed

Step 5: Fridge it.
Now is the part where you let the flavors meld together and the bars firm up. I imagine 4 hours at the least but I let mine rest overnight.

covered and smoothed

Step 6: Prepare for everyday snacking
Once the bars have rested, take them out of the container, put on a flat surface, and cut into bars, about 2″ wide by 3-4″ long. For the square pan I halved it width-wise then cut each side into four portions. You end up with about 8. then you taste it so lets say 7. Tear off pieces of wax paper that are large enough to comfortably wrap each bar within. you can tape them closed, like little mini presents, or get fancy-schmancy and wrap them again in fancy paper and fancy yarn for a picnic time snack.


Store these in the fridge until you are ready to eat!
I had some ideas for other flavors to add to the almonds and dates, but most you can copy from lara:

Key Lime Pie: Lime juice, lime zest, crushed graham cracker (just a bit), cashews, coconut
Black forest cake: Cherries, cocoa powder, chopped dark chocolate bits, maraschino cherry juice.
Blueberry pie: dried blueberries, lemon juice, lemon zest, blueberry juice (or a few teaspoons of a juice cocktail), cashews
Peanut butter cup: Peanut butter 2 tbsp, cocoa powder, mini chocolate chips, peanuts, almond meal.
Strawberry banana smoothie: Freeze dried strawberries (found in snack aisle at Target), handful of banana chips, 1/3 ripe banana, almond meal, lemon juice
Cranberry orange white chocolate cookie: Cashews, dried cranberries, orange zest, orange juice (1-2 tbsp), white chocolate or yogurt chips, pinch of crushed graham cracker
Lemon thyme cookie: Lemon zest 1tbsp, lemon juice, vanilla extract, tsp lemon thyme, 1 scoop vanilla or cake batter protein powder
Hummingbird cake: cinnamon, ginger, dried pineapple, grated carrot, walnuts, pecans, 5 maraschino cherries
Ginger snap: 1 tsp grated ginger, 2 tsp molasses, few strips of crystallized ginger, cashews, pinch cinnamon, pecans
Pecan pie: Pecans, butterscotch chips, cinnamon, ginger, pinch of mace, orange zest

The list can go on and on..and I want to eat all of them if you have the right combinations the possibilities are endless.

omnomnom

Happy blending!
– Stine

Baked Ziti!

HEY! So I graduated (hurray!) and will hopefully have a: a life, and b: time to blog.

Last night I made good housekeeping’s baked ziti, which I found via serious eats. It is SO GOOD and you bake it in the skillet that you sauté everything in, which is awesome. I didn’t use a skillet, however, because I don’t think mine can go into the oven. I’m too scared to try.

Ingredients:

Olive oil

1 28 ounce can of diced tomatoes (I used crushed – boyf and I are moving and that’s all we had in our extremely bare pantry-good housekeeping said to buy whole and chop yourself via food processor and WHO THE HELL has that time/desire to do so many dishes!?)

6 cloves of garlic: chopped

1/4 teaspoon red pepper flakes (you can adjust to your liking; this made it pretty spicy!)

1 box of ziti (I used penne which was 13.2 ounces (?) and partially whole wheat)

3 cups of water

parmesan cheese

4 ounces of mozzerella

1/2 cup of heavy cream

1/4 cup fresh basil- chopped (I didn’t have any, so I used a smaller amount of dried)

Okay! Let’s go! Preheat the oven to 400 degrees. Heat the olive oil in your skillet (or pot: I didn’t use a measurement because I think I ended up using more because I had a bigger surface area), using enough to coat the bottom on medium low heat. Add the garlic and the red pepper flakes and cook for about a minute until it’s fragrant. Add the tomatoes and bring up to a boil- after it begins to boil, reduce to a simmer and add the 3 cups of water and the pasta.

Cook the pasta until it’s tender, about 10-15 minutes (depending on your type of pasta). Once that is tender, add the 1/2 cup of heavy cream and basil and stir very well. Once the cream is combined, add parmesan cheese (I only had the terrible canister kind because I was making risotto tonight and needed the fancy kind) to your liking and stir well.

Once that is done, add the mozzarella right on top and pop that baby into the oven for 10-15 minutes, or until the top is browning and bubbly!

Enjoy this carby-cheesey delight! I know I did.

Tagged ,

Veggie Burgers…with Bacon.

So, maybe your boyfriend (or girlfriend) is really good at making burgers. I mean REALLY good at making burgers. And maybe that significant other gets kind of upset when you suggest that you want to make homemade veggie burgers.


WHYYYYYY?? ISN’T THAT SOMETHING YOU CAN DO WITH CRAFSTINE?????”


Well, I didn’t do it with Crafstine because she’s busy working on her final grad paper (I should be too, but instead I’m making veggie burgers….hahahahahaa….wahhh….) but the boyf is gone for the weekend, so I had the opportunity to make them without him whining every second about how I’ll never want to eat one of his burgers again (I do!!!!).

I got this recipe from 101 Cookbooks. I made a few changes, however. I left out the sprouts and the lemon zest (because I didn’t have them) and added a piiiinch of cayenne. I’ll add more next time, because I didn’t really get a kick. Those were the only changes I made, and I followed the cooking procedure to a T.

Not shown: breadcrumbs, eggs, and toppings. I added guacamole, tomato, and bacon. 

I was also hungry so I made the patties much bigger. I got  8 patties out of the mixture, since I made them bigger. And I didn’t have bread either! So I used two patties as bread and put the “toppings” in the middle. ….I’m a fatty? I was hungry!!!

tadaaaaa!

I highly recommend Heidi’s recipe for these burgers. They were delicious, although a bit messy, but isn’t that the fun of eating? You know, like chicken wings.


-megz

Tagged